EVERYTHING I KNOW ABOUT SOURDOUGH
Though I think the sourdough craze is dying down a little, there’s still a lot out there in the way of sourdough, and it can overwhelm. I’m definitely still learning too and thought I would share what I have learned so far so we can learn together. This is a bit long, but these are just my notes on what I am learning through lots of trial and error and other blogs and youtube videos and Instagram sourdough makers. My favorite resources are The Perfect Loaf , Tasty , Baker Bettie , and Chad Robertson (Tartine) to name a few. There are thousands more on the Internet and thousands more on Insta. Hopefully this is somewhat helpful, and feel free to reach out on Insta! I’m happy to answer any questions/ connect with you and happy baking!


Don’t be scared. You just gotta try and fail. And honestly, even the fails are delicious. If it’s not even edible, chop up the bread, toss it in some olive oil and bake to make croutons!
My Basic Sourdough Recipe is
200g Starter
1000g Strong Bread Flour
800g Water
25g Salt
STARTER
Starter. I keep my sourdough starter in the fridge and feed it once a week. My ratio is 1:2:2
50 g old starter (discard the rest)
Sourdough discard is just sourdough starter that isn’t ripe. So if there is a recipe using sourdough discard, they just mean starter that is straight from the fridge and unfed.
100 g cold drinking water [I used a Brita water filter in London but feel comfortable drinking the tap in Glasgow so have been using tap here]
100 g organic flour [50 g white + 50 g brown]
Mix and leave on the counter overnight, covered but not airtight. You can tell it is ripe when it has doubled or tripled and the surface is full of different sized bubbles.
I like to use old jam jars and will leave the lid on without screwing it tightly closed.
Water. Although it is probably good to, I don’t worry about water temperature. I can’t be bothered, and it’s always turned out just fine.
Sharing is caring. I loved making my own starter, and there are so many great sites on how to make it, but it does take about 2 weeks to make so if you don’t want to make it yourself, ask around! If you’re in Glasgow, I’m happy to share mine.
DAY 1 - night
Levain. When I want to bake, I make my levain (levain is starter for the purpose of baking bread) from cold starter the night before. I take 50 g of cold starter from the fridge and mix it with 100 g cold drinking water + 50 g organic white flour + 50 g organic whole wheat flour. I let this sit overnight in our cold kitchen. And it’s usually doubled/ tripled by the morning. You know it’s ready when you take a small scoop of the levain and it will float in a cup of water. But after a few times of making overnight levain, you can usually tell it’s ready because the dramatic increase in volume and the amount of irregular bubbles on top.
Ingredients. Sourdough only has 4 ingredients: Flour, Water, Salt, and Time. (Also temperature but I’ll get into that later). Time is a big factor in sourdough. It’s a lot of waiting, and I’m not a patient person by any means so sourdough has been an exercise in patience, for sure.
Tools.
Large glass or ceramic bowl so plastic wrap will go tightly over it.
Scale. It’s more accurate and the more accurate, the more reproduceable and consistent the results.
Dutch oven with lid/ Cast iron casserole dish with lid. I have a 24 cm Le Creuset I got for almost nothing on Gumtree (UK Craigslist) that I use. But since it’s round, I can only do round boules and not oval shaped loaves.
Fridge space. This seems odd, but you need to have space for the dough to rest overnight in your fridge.
Timer. I have an old magnet one that’s on my fridge that’s moved with me 4 times now. I love it.
Dough/ Bench Scraper. I have a few but I think you need at least 1 stainless steel bench scraper and one silicone or plastic dough scraper. It makes moving the dough much easier than trying to move it with your hands. It also serves to cut the dough. The silicone dough scraper is great for scooping all the dough out of the bowl.
Lame/ Sharp knife. I hate having things in my kitchen that serve a singular purpose, but my lame is one of those. A lame (pronounced lamb) is a razor blade just for making a slash in dough. I don’t think I purchased mine until 5 months into baking because I was convinced it was a waste of money. However, I do find the razor will give me a much cleaner, deeper cut into soft dough than my knife will. This in turn helps me get that beautiful ear when it’s baking. It’s not necessary, but it actually is helpful.
Notebook. Another optional thing, but I find keeping notes on sourdough helpful to making adjustments and progress.
DAY 2 - day
Autolyse. For breads, I always autolyse. For pizza dough, I don’t. Autolyse is just a fancy word for hydrating the flour with water. So if I am baking 2 big loaves, and I want to make loaves with 80% hydration, I would hydrate 1000 g of flour (1 kg of flour. White is delicious, but I like to mix 800 g Canadian strong white flour and 200 g whole wheat flour to have a nuttier sourdough) with 750 g of water. Wait, isn’t that only 75% hydration? The missing 5% of water (50 grams) will go in when I add the starter and salt, an hour later. The sourdough will be 80% hydration, but the autolyse is only 75% hydration. So in other words, autolyse means adding water to the flour, mixing it well, and letting it sit so the flour has time to soak up the water. I will leave it covered with plastic wrap for an hour or two at this stage.
Baker’s percentage: % of something to the amount of flour you have. 1000 g of flour is easy because 70% of 1000g of flour is 700. So 70% hydration means 70% water. If you are working with 500 g of flour, a 70% hydration dough means 350g of water.
Types of flour. You can make perfectly delicious flour with all purpose white flour. But if I have access to strong / bread flour, I do prefer it. it essentially has a higher protein content so it will give you a chewier texture, vs something like cake flour with a lower protein content, which is designed to be fluffy and tender. I use Canadian Strong which has a protein content of like 14% - 15% vs all purpose flour, which has like 11% - 12% protein content.
Mixing. After an hour or two of autolyse (1000 g flour + 750 g water), I add
50 g of water
200 g of ready levain (20% levain to 1000 g flour)
25 g salt (2.5% salt to 1000 g flour)
Dimple everything in and then mix well
Bulk Fermentation. After autolyse, building gluten during bulk fermentation is the most actively time consuming part of the sourdough making. There are 3 common methods of stressing the dough.
Coil fold - I use it mostly for higher hydration doughs (80% and up)
but personally I think coil fold and stretch & fold are interchangeable. You scoop your hands under the wet dough and lift the center up so the ends that are dangling down and coil them underneath the dough when you put it back into the bowl. Rotate 90* and repeat 4 times until you’ve come full circle.
Slap and fold - I don’t use this one because it’s messier and harder, but essentially you pick the entire wet dough up and slap the bottom down on a flat surface/ kitchen counter top and then fold over the top. Pick it up and do it again and again. It will want to stick to the counter and be a mess, so be forewarned.
Stretch and fold - I use this one the most commonly. Take one side of the round dough and stretch it up as high as it will go without tearing. Then fold it over the entire dough to the other side. So if you pick up a side from the left, lift up and then fold it over to the right. Turn 90* and repeat until all 4 sides are done.
You want to have at least 4-5 hours free time, at home. Building strong gluten bonds means a lot of stressing the dough through stretch and folds, every 30 minutes, 8 times. Gluten is what gives bread its strength. You know how some breads require kneading while other things like pie dough, you don’t want to work too much? That’s because the more you handle dough, the stronger the gluten strands get. Gluten is a wheat protein, and that’s about all I know about the science behind it. All I know is, you wanna strengthen the bread by constantly stretching the dough. Once you’ve stretched it, the dough will bunch up and want to stay tight. Then you let it relax for 30 minutes. Then you stretch it again. Over and over again.
When you look down at the dough, it’s an odd shaped round blob. Assume it has 4 “corners”. Stretch and fold means grabbing each “corner” of the dough, and pulling it up and over itself. Stretch as far as it will go before it tears. Right, top, left, bottom. You’ll start to see this wet mess of flour and water turn into a shiny, cohesive dough over the course of 8 stretch and folds.
Use wet hands for the stretching and folding. It’s gonna stick like crazy to your hands otherwise. You can use flour, but I don’t want to add more flour to the dough. So either have another bowl of water next to the sourdough or just have your tap running while stretching and folding.
Sourdough is alive. 4 hours is really dependent on the temperature of your kitchen. Remember the levain? How it’s just a little bit of the sourdough starter and then you fed it “food” in the form of water and flour? And then it becomes all bubbly and active? That’s essentially what you’re doing with the dough. The levain is feeding on the large amount of flour and water. Ideally your kitchen is like 75*F/ 24*C. Heat speeds up the fermentation of sourdough while cold slows it down. So in the summer, I found it harder to make sourdough when our kitchen was so warm. Not only because the oven would heat up the whole flat to unbearable warmth, but because the dough will want to ferment so quickly that you won’t be able to get in 8 stretch and folds over 4 hours. So if your kitchen is warmer, maybe it means 6-8 stretch and folds every 15 minutes would be better for your dough. On the other hand, a colder kitchen, like in the winter, is going to slow the fermentation way down. So maybe it means leaving it to bulk ferment for 10 hours on the counter after 8 stretches. Or it means I up my levain percentage so the starter is stronger and will ferment the dough more quickly. That is something I am experimenting with right now as my kitchen is freezing.
Practice/ repetition will help you develop the tools necessary to listen to/ read your sourdough in a way.
When the dough is ready to go into the fridge, it will have grown by about 50%-70%. And very jiggly. It’s fermenting and growing and air bubbles are happening inside the dough. You’ll probably even see them on top of the dough.
Refrigeration. I know most people shape the night before by placing their dough into bannetons, but I can’t get them to work for several reasons. I can’t use a towel to line banneton baskets because I have a dog and no matter how careful I am, there are teeny tiny microscopic dog hairs on my tea towels that will stick to wet dough. And without a tea towel, no matter how much I flour the banneton, it still sticks. Lastly, bannetons are hard to keep clean without a tea towel, which I find annoying. All that to say, after 6-8 stretch and folds, I cover the entire bowl with the dough in it with plastic wrap and then stick it into my fridge. I let the dough sit in the fridge for 24-48 hours. (It is October in Glasgow right now, and I am experimenting with 4-5 day retards because my kitchen is too cold for a proper bulk fermentation).
DAY 3
Preheat. I preheat the oven to max for at least an hour, with the dutch oven inside of it so it’s screaming hot by the time the dough goes in.
Shaping. I find shaping to be the hardest/ funnest part of the entire process. There are so many ways of shaping! I find Instagram a great resource, full of shaping videos that are so helpful. Because I shape the day of the bake, that means my sourdough is full of air bubbles when it’s still in the bowl. That’s what you want, a jiggly bubbly dough. This means though, I have to handle the dough carefully when I take it out of the bowl, divide it, and shape it without destroying all the air in it. But I find working with cold dough easier. If I am working with 1000 g of flour, that will give me 2 large loaves. Flour the work surface first. Then, I like to use a soft, silicone spatula or bowl scraper to help me get the dough out unto the floured surface. That leaves me with one side of the dough that is floured (the bottom) and one that is not (the top). Try to keep the top flour free so it will stick to itself when shaping. Divide in half so you have 2 doughs. Take the top part of 1 dough and fold it down over itself, like you’re folding a letter to stick into an envelope. Bring the fold down about 2/3 down the body of the dough. Then take the right side and fold it over so it comes to center. And then the left side to the center. And then bring the bottom up and fold it up halfway. Then stitch the left and right sides over each other so you get a tight boule. Not having flour on the top will really help the dough to stick to itself. The tightness of the boule will help the dough rise up. This takes so much practice! And probably doesn’t make much sense written down so I definitely recommend watching lots of videos on it.
Since I usually make 1000g of flour at a time, giving me 2 doughs, I usually bake 2 at a time. But making a 500 g flour loaf would give you 1 loaf you don’t have to divide, just shape.
I flip it so the stitch side is down on to a piece of parchment paper. And let it sit and relax for 20 or so minutes.
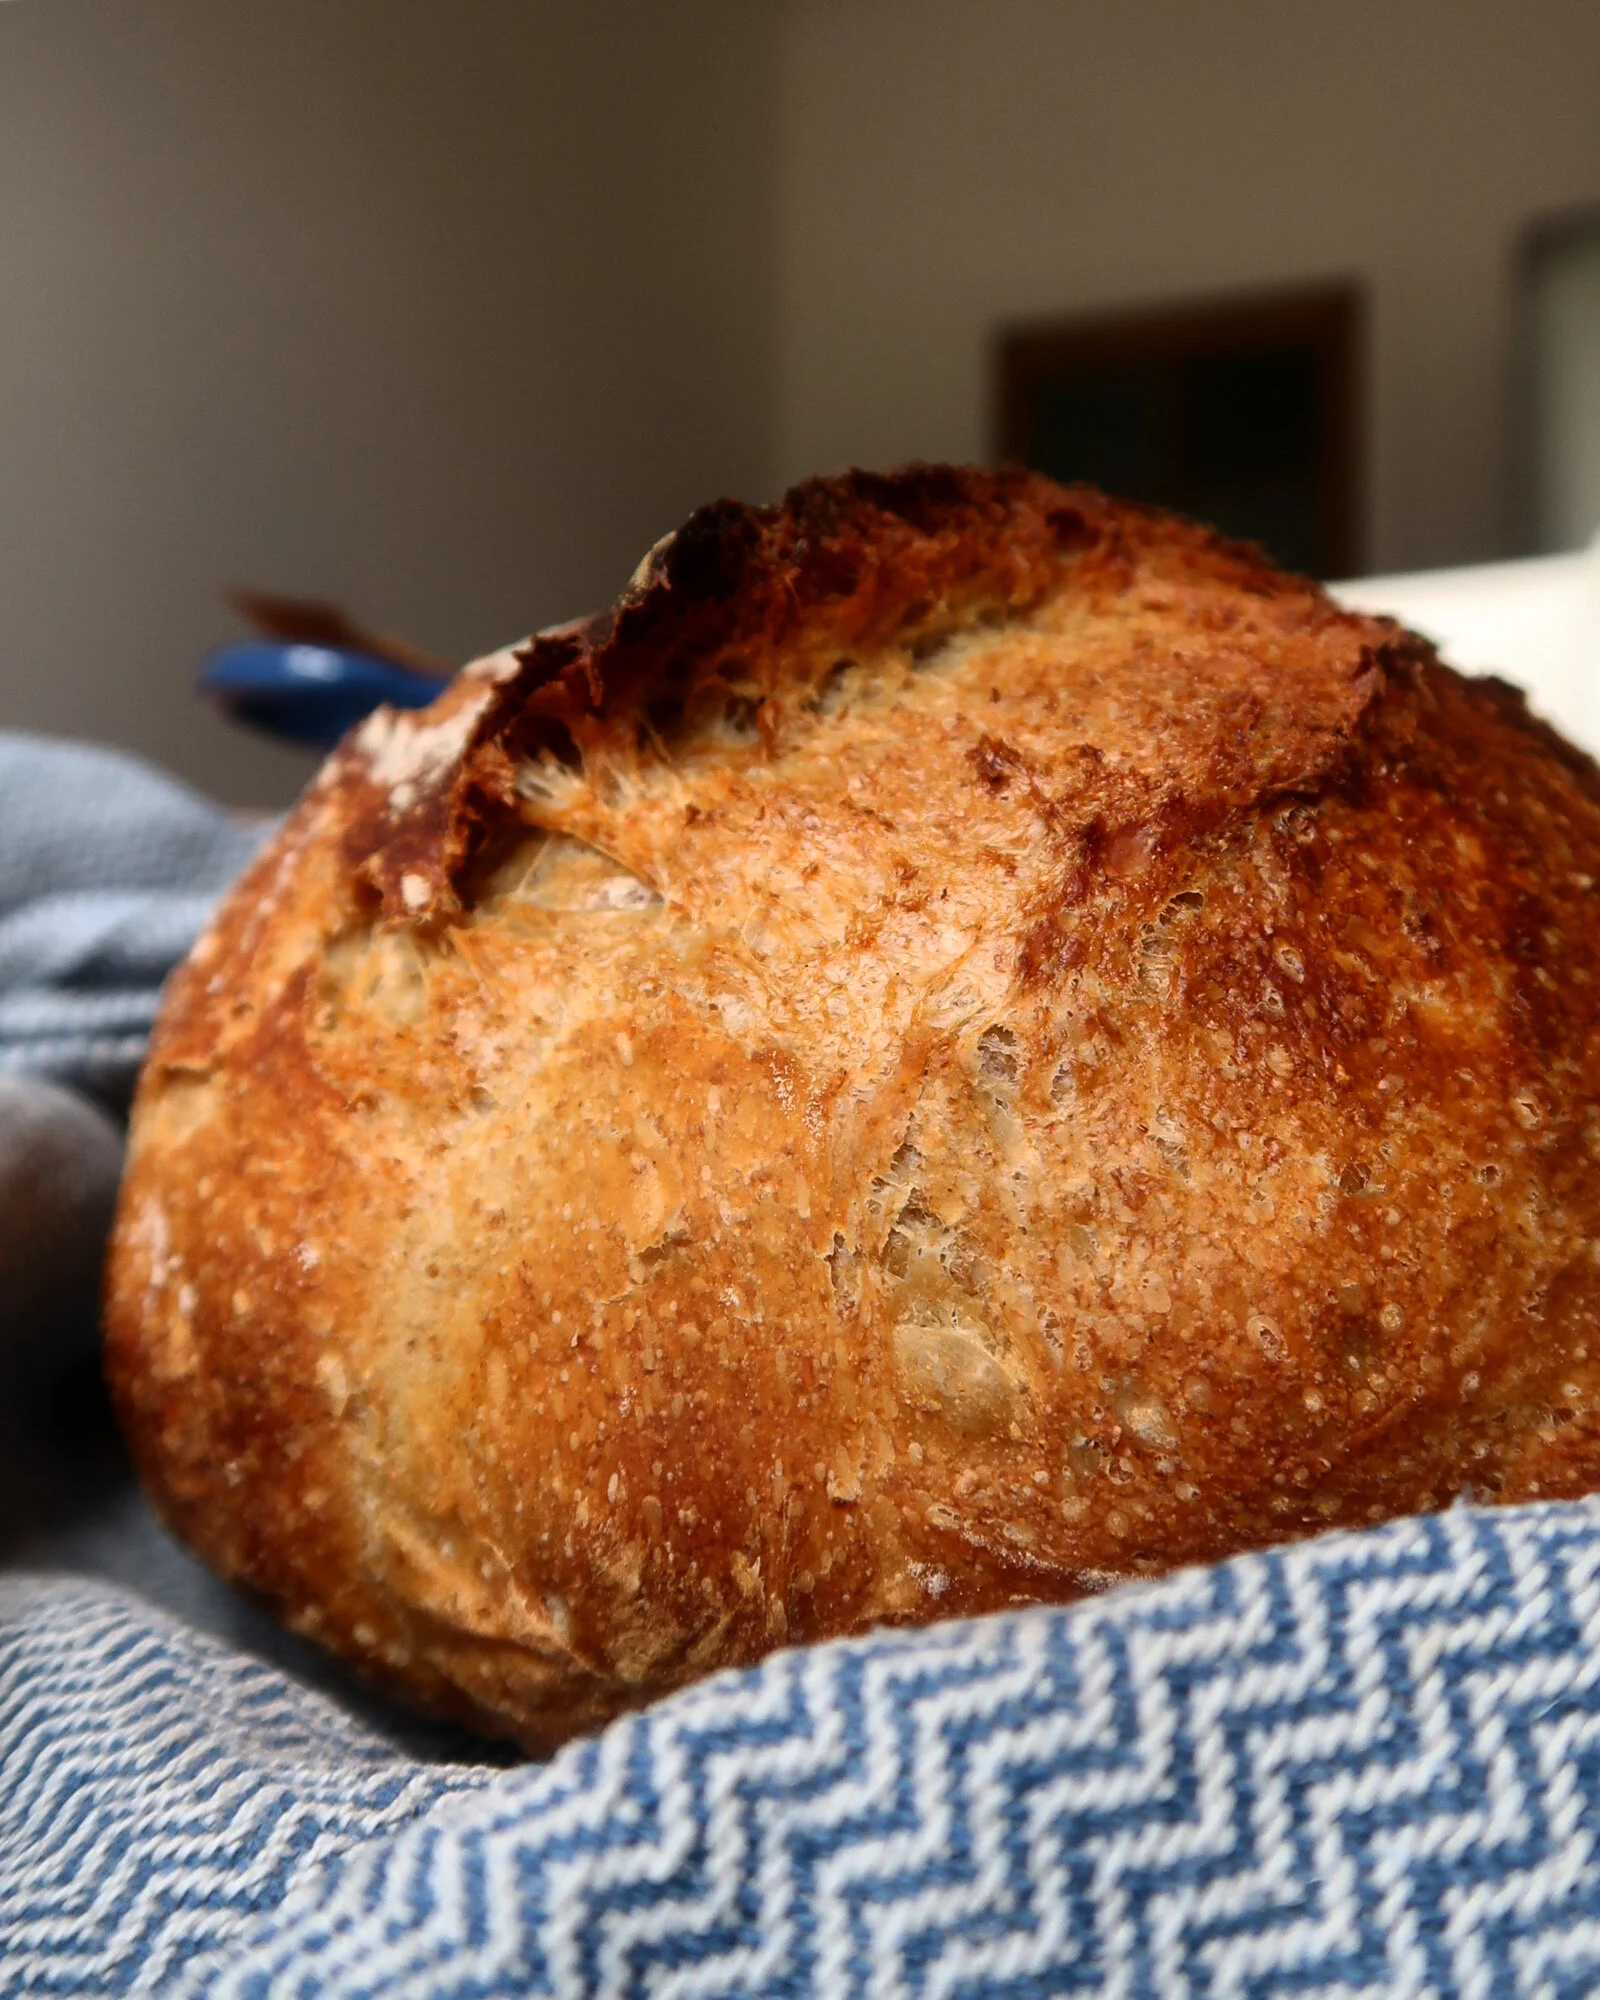
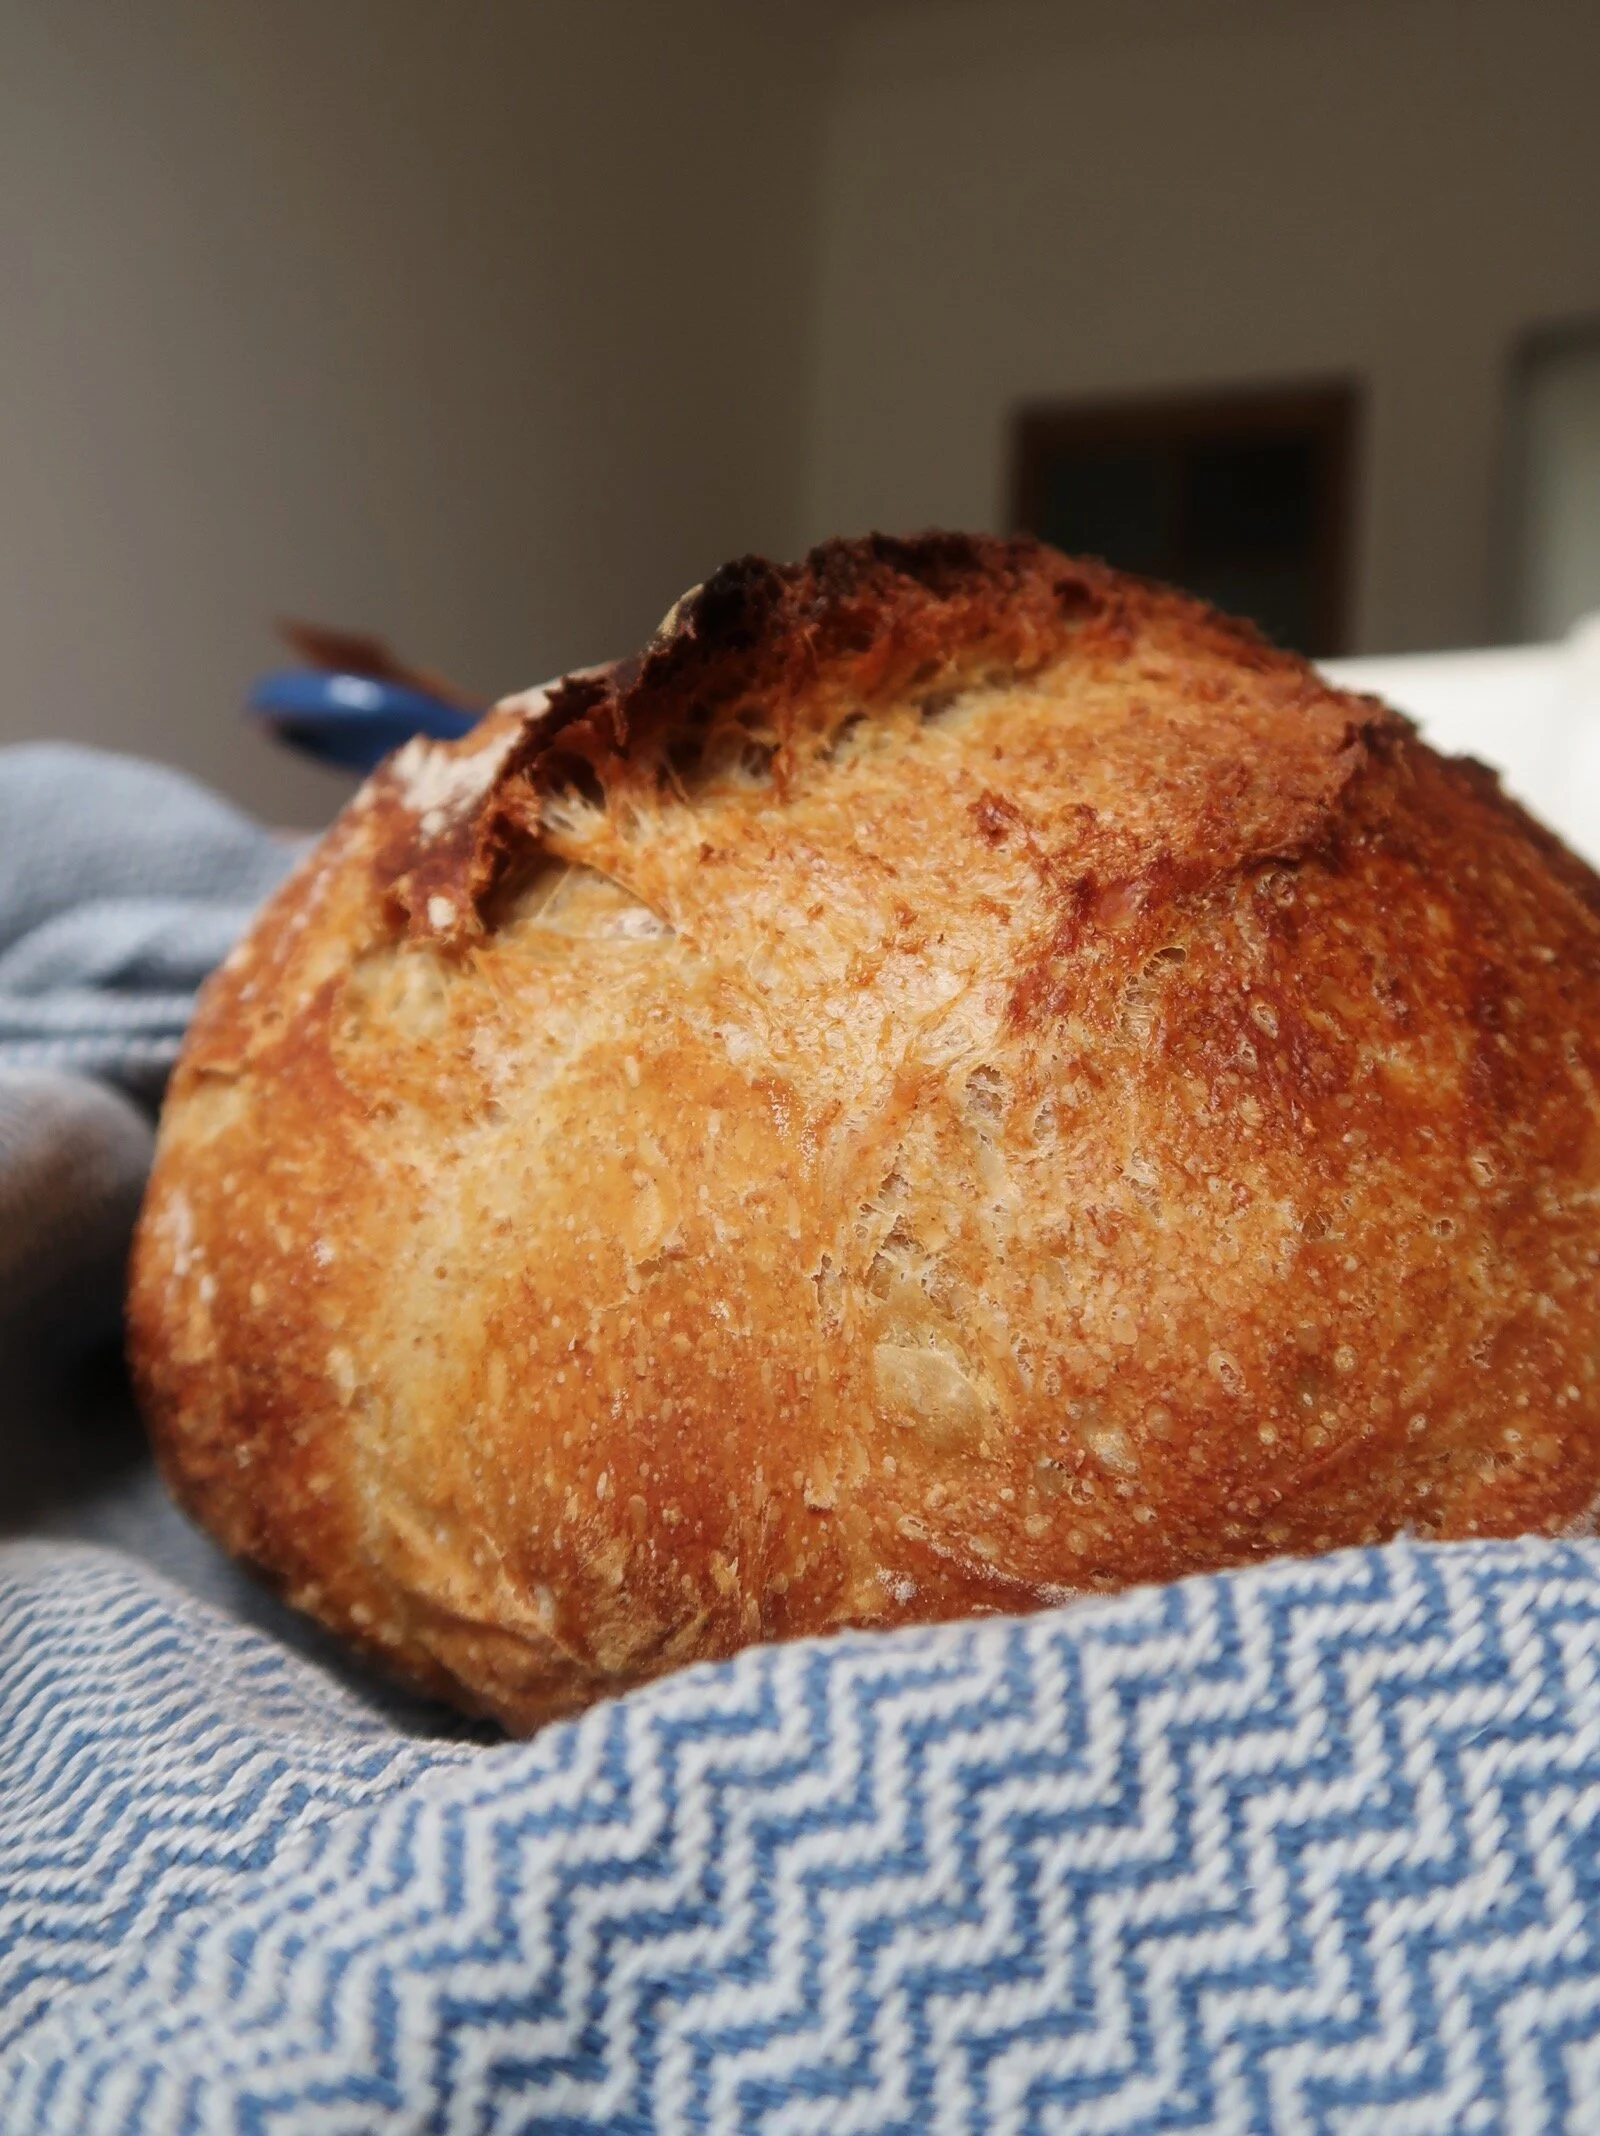
Scoring. Take a small sheet of parchment paper and flip the boule (French word for ball), seem/ stitch side down on to it. Now the floured bottom is at the top, smooth and taut. Right before it goes in the oven, take the razor or knife and make a cut about a third of the way down from the top. It helps the blade go smoothly if the surface of the dough is floured. Cut horizontally, so the blade is sideways, into the side of the dough as opposed to down into the work surface. There’s tons of different scoring techniques too and lots of creative interpretations of it, so have fun. This is just what I do.
Baking. Carefully, take the hot dutch oven out of the oven and carefully place the parchment paper with the boule inside of it. Place the lid on top and put it back into the oven. Start timer for 30 minutes. Half an hour later, take the dutch oven back out and remove the lid. This is the first moment of truth. Whatever the dough is at this point is what the dough will look like when it’s finished, so hopefully it’s doubled and there’s a split where you scored the dough. If it doesn’t look right, don’t despair! Take the oven heat down just a tad bit. Put the dutch oven back into the oven without the lid. Start the timer for another 30 minutes. Alright, you’re all done! Now you can move that beautiful brown loaf of crusty bread to a cooling rack and wait another 30 minutes before cutting into it. You did it! We did it!
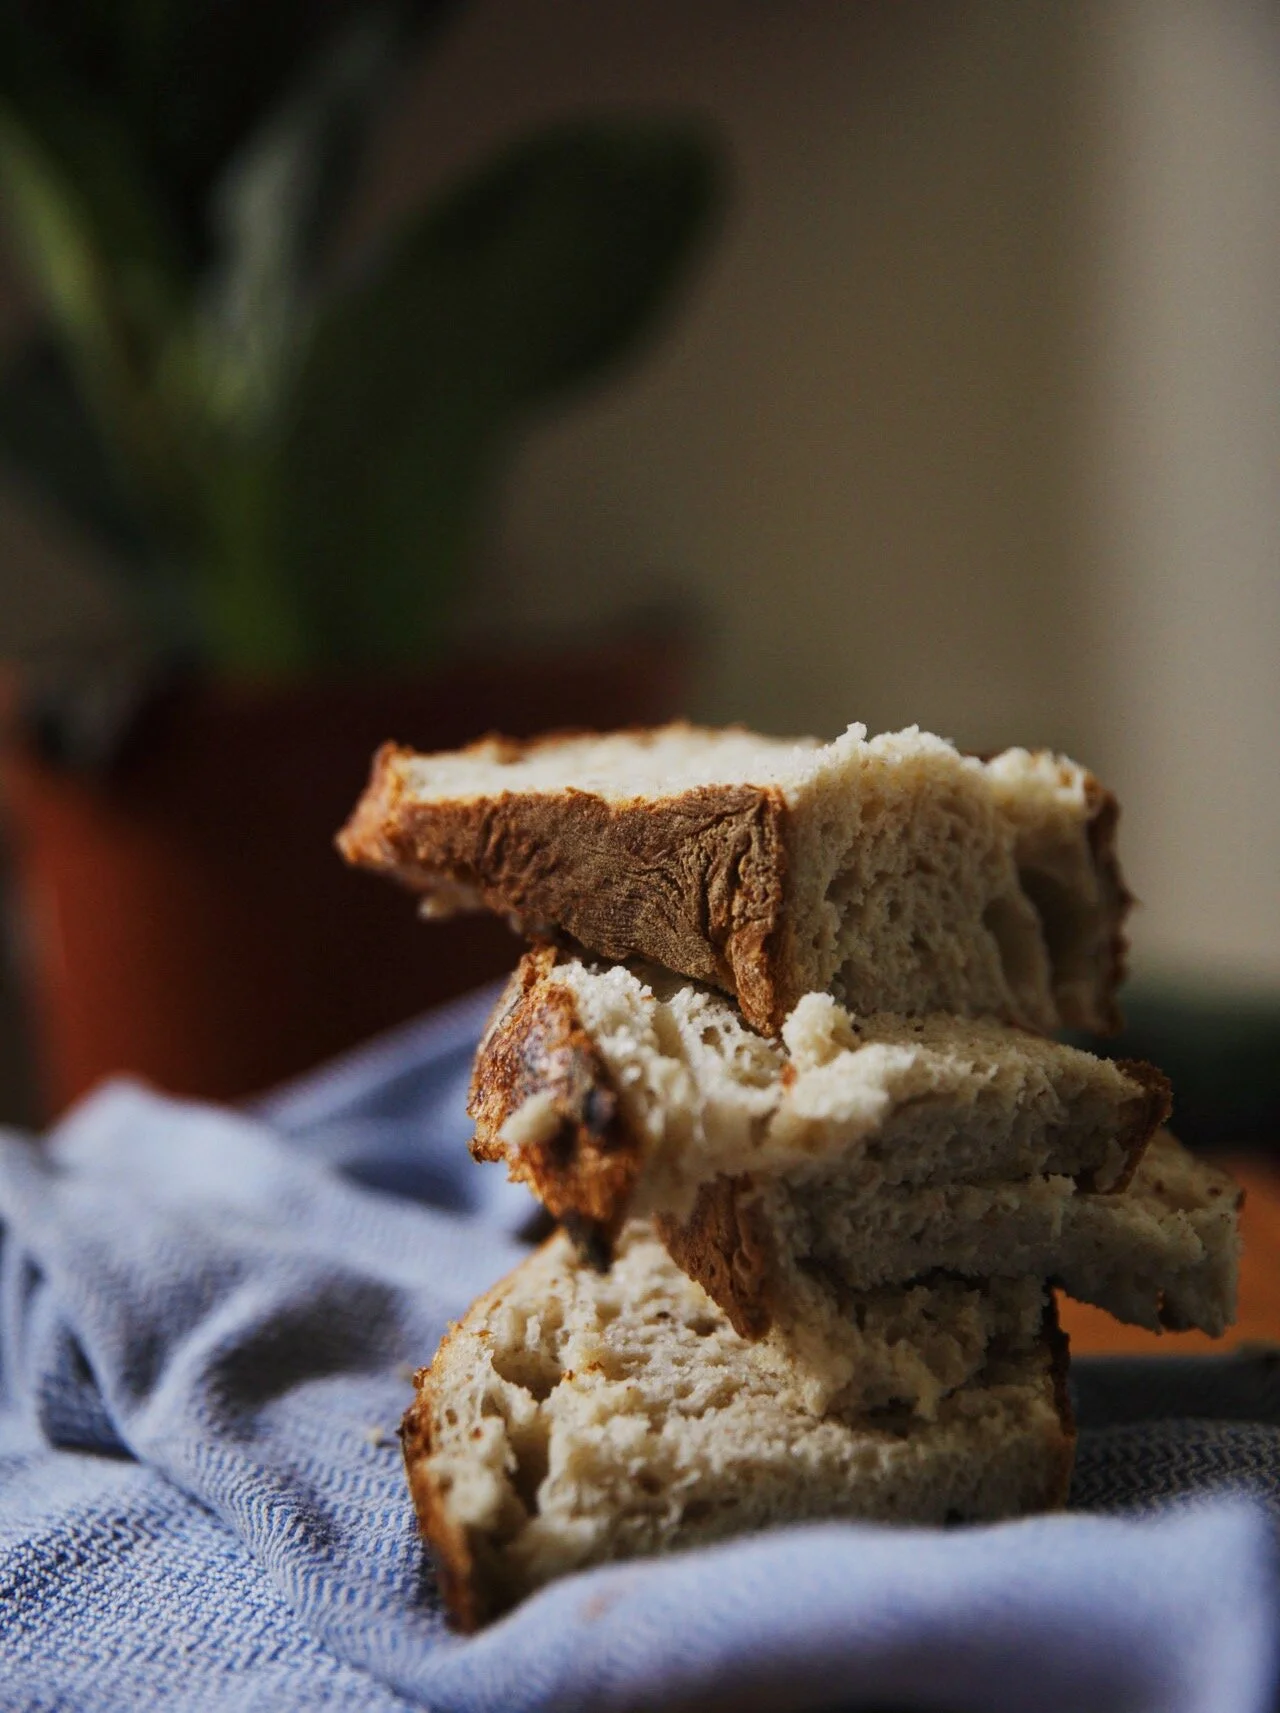
When you cut into it, that’s the second moment of truth. You’re looking for a crusty exterior and a spongy interior full of holes. I think social media kinda plays up the large holes in sourdough as a mark of technique and an aspiration, but you’re just looking for a network of holes throughout the entire slice.
It takes me 3 days to make sourdough. That sounds dramatic, but I start the levain Friday night, and mix and stretch and fold Saturday day, usually in the morning until early afternoon. And then bake Sunday morning. That’s generally my baking schedule once a week.
I usually have 250 g starter in the fridge (50g old starter + 100g flour + 100g water). Pizza dough is the other thing I make almost every week. I’ve been trying to use it for other things too like rolls and pastries (instead of using commercial yeast), but I end up throwing a lot of it away since I refresh my starter every week. The starter you throw away is called discard. I make sourdough pancakes with the discard every few weeks too.
Whenever I’m using starter instead of yeast, I assume it’s going to need an overnight proof in the fridge while commercial yeast is ready to go in an hour.


PIZZA DOUGH
Pizza dough is the easiest thing to make.
Day 1 is the same. 50 g starter + 100 g water + 100 g flour (50 white/ 50 whole wheat). Ferment overnight to get an active bubbly starter the next morning.
Day 2, no autolyse. Just mix everything together.
200 g starter + 1000 g flour (Canadian strong white) + 750 g water + 25 g salt + 20 g olive oil
4 stretch and folds, every 30 minutes.
Seal with plastic wrap and put it in the fridge
Day 3/4/5. Bake.
Refrigerate for at least 48 hours up to something like 4-5 days
I divide it into 300 g pizza doughs before shaping into little balls, letting it rest for 1 hour, and then flattening into a pizza-ish shape and adding toppings.
Favorite toppings right now are thinly sliced courgettes/ zucchini and green onion/ leek and olive oil and salt. Sometimes mozzarella. Sometimes tomato sauce.
Preheat oven to max for 1 hour
Cook time is 15 minutes for my oven, but keep an eye on it
Invite people over and enjoy!


MAKING MEMORIES