HOLIDAY - CHRISTMAS COOKIES
These cookies are shortbread-ish, firm but chewy without being soft, and they can technically last on the countertop for over a week, but never do. They do not require equipment so anybody can make these as long as they have the ingredients, some bowls and an oven. Technically, you do need a scale but I don’t consider that a tool anymore than a spoon or bowl at this point. They are not too pricey and will ensure the same results every time. Of course, you can also look up a conversion online, but I highly recommend getting a kitchen scale. Also, I hate when recipes use a different number of yolks and egg whites and you’re left with a small container of something that you have to remember to use. Sometimes it is necessary, like for a custard, but not today. Lastly, these cookies are a lot of butter so they do need to be kept cold if you want the cookies to keep their shape in the oven. Alright, let’s get baking!
INGREDIENTS - COOKIES
250g Soft butter
150g Sugar
3g Salt
Vanilla
2 eggs (1 whole egg + 1 egg yolk)
450g Flour
1tsp Baking powder
1tsp Cinnamon *totally optional, but I like it
INGREDIENTS - ROYAL ICING
1 egg white
Box of powdered sugar
Small pinch of salt
Lemon juice or Milk
Gel food colouring
TOOLS
Off-set spatula for icing *helpful, not necessary
INSTRUCTIONS
Crack a whole egg and a single egg yolk into a bowl and save the remaining egg white for the royal icing. (You don’t want any yolk in your egg white so be careful.)
Measure out the flour, and go ahead and add the baking powder and cinnamon to the flour.
In a big bowl, mix the soft butter, sugar, salt, vanilla and eggs (1 egg + 1 egg yolk) together until everything is incorporated, a thick uniform consistency.
Add the flour mix about a third at a time, using a spatula to incorporate the flour into the butter until it disappears.
Form the cookie dough into a square shape, cut it in half, and wrap the 2 pieces in separate plastic wrap. Let the dough rest in the fridge for at least 2 hours.
When you’re ready to bake, preheat the oven to 170*C
Grab a few baking sheets and line them with parchment paper
Grab your cookie cutters.
Grab one dough from the fridge. Dust the work surface with flour, and dust the top of the dough. Roll out the cookie dough to a little less than 1/4 of an inch or 3-4 mm.
Punch out shapes and place on baking sheet. They’re not going to spread too much so they don’t need to be spaced out too much.
Bake for about 18-20 mins. I bake them until they start to get lightly brown on the edges, but they will bake faster or longer depending on how thick you rolled out the dough. If you have some cookies waiting to go into the oven, just keep them in the fridge until there is space.
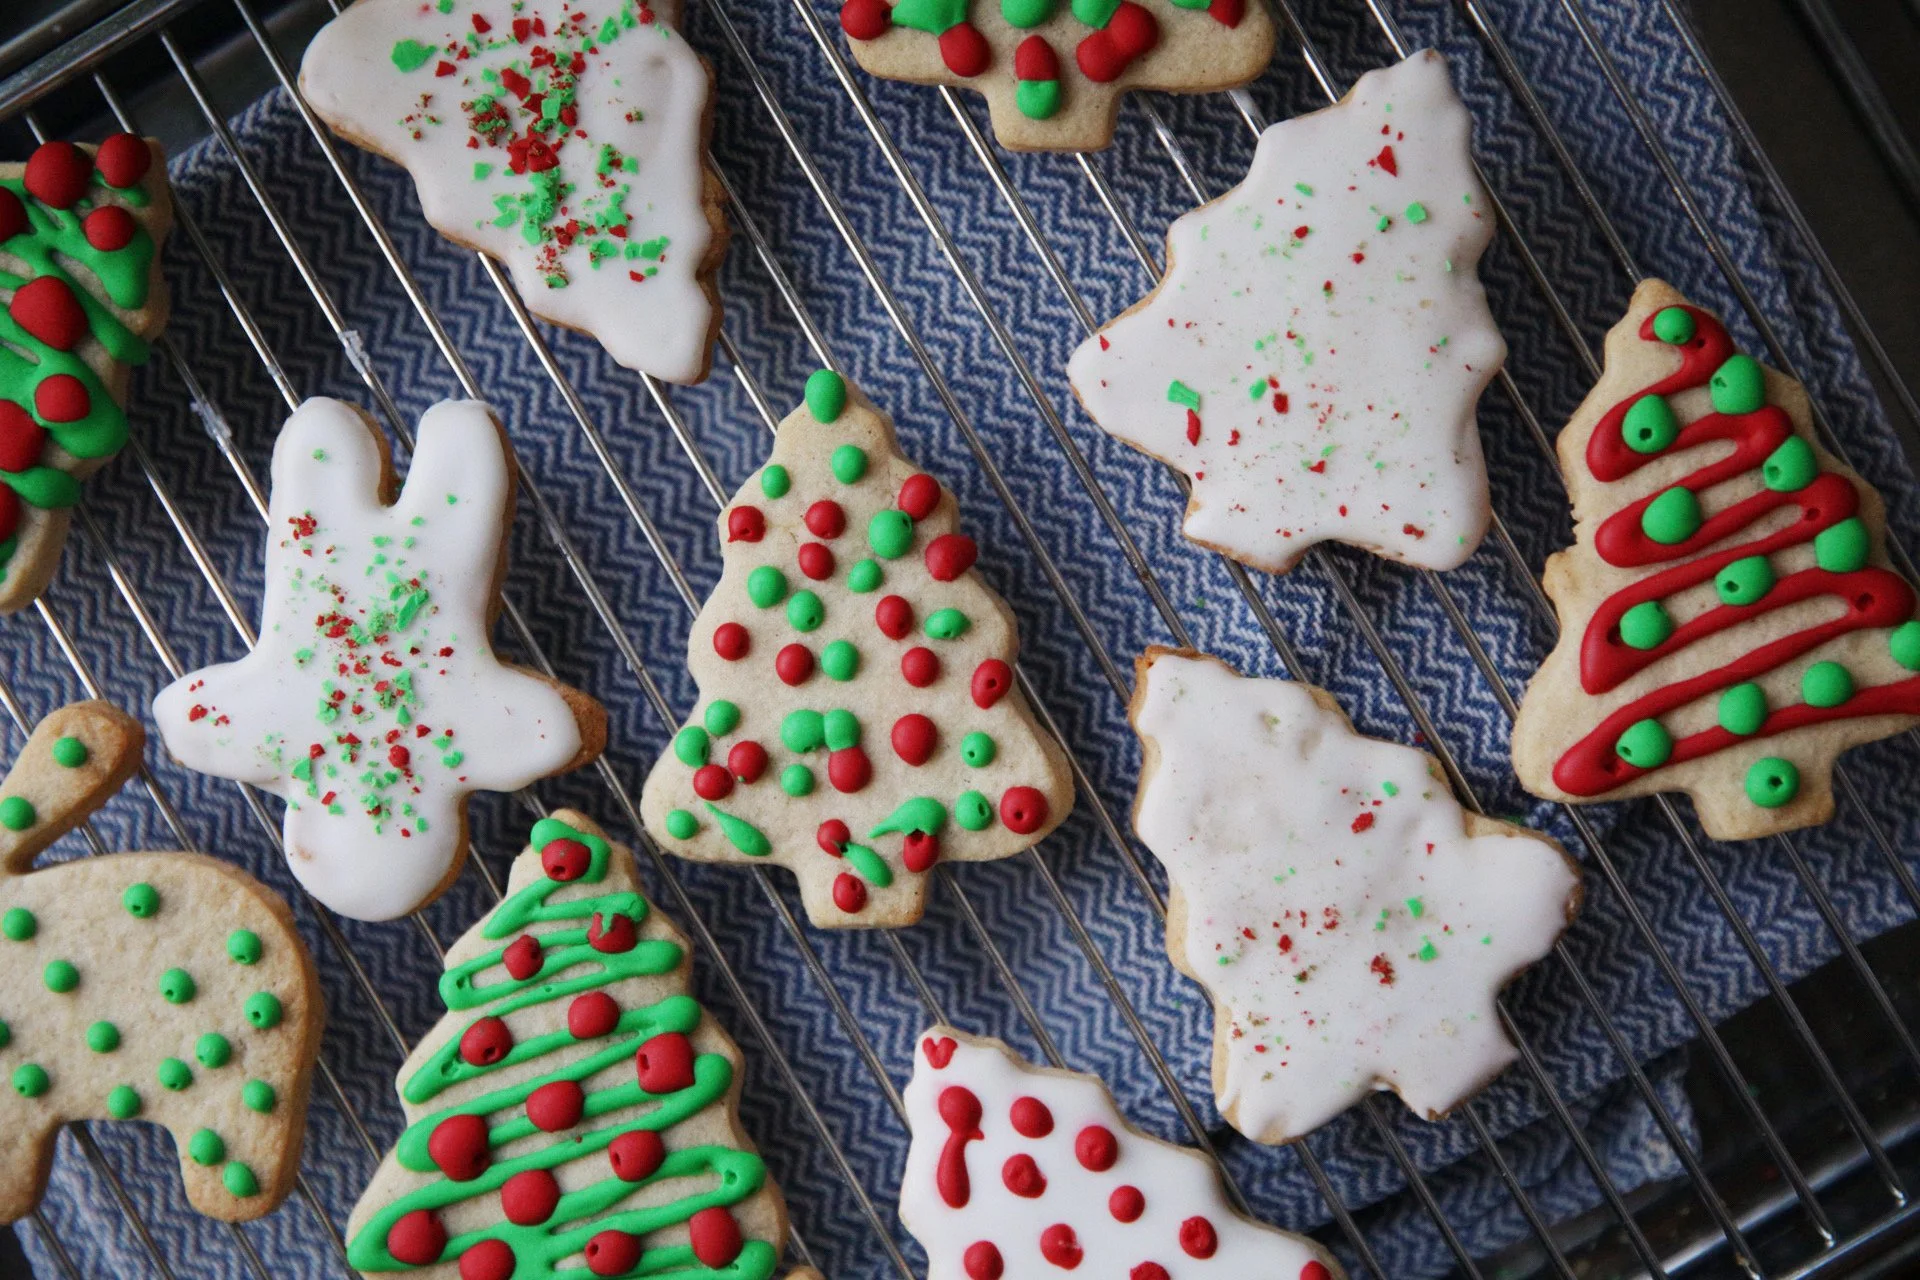
Let the cookies cool completely before icing them.
Royal Icing! I used to have such a hard time getting royal icing to set completely dry, but there are 2 requirements to royal icing :
Whisk that egg white until it’s frothy frothy. Like halfway to meringue. Full of big and little bubbles that take up twice as much space as before. *This is totally doable by hand, but if you have a hand-held electric mixer, it takes 5 seconds.
Add a lot of powdered sugar. It needs to be hard to mix the spatula around because of how thick the icing is. Keep adding powdered sugar until there’s resistance when mixing.
Now we’re going to reverse the thickness by adding a tiny bit of liquid at a time. I used lemon juice, but it’s very sharp and the cookies tasted lemony. If you want a more simple butter cookie taste, add milk or even water. Just add enough until the spatula can move through it.
Add a pinch of salt.
If you want to have colours, pour some into separate bowls and mix your gel colours in. Then, pour the coloured icing sugar into ziplock bags or piping bags if you have them. If you’re using ziplock, make sure that the cut you make for the hole is quite small.
Now go crazy. After making a hundred or so of these Christmas cookies, I found I prefer to dunk the cookie into the original royal icing, let it cool and harden, and then decorate by piping the colours on top of the dried white canvas. I find an off-set spatula to be helpful in smoothing things out, but if you don’t have it, it’s not necessary.
SPRINKLES
Last thing, if you want to make home-made sprinkles, just take the coloured royal icing and spread a thin layer on parchment paper. Let it dry overnight. Next morning, crumble the dried icing into a jar labeled “Sprinkles”.
Happy Holidays and Enjoy !


MAKING MEMORIES