HOLIDAY PIE - VEGAN CHOCOLATE TARTE

This chocolate tarte is both Vegan and Gluten Free, but it’s so good that I don’t even want to make it about that. Our family has no food restrictions, and I make it regularly for both special occasions and just because. This chocolatey, decadent, and easy pie comes together in half an hour. Once assembled, you can pop it in the fridge and forget about it overnight. Best served cold, it makes for a great make ahead kind of pie, good for chaotic holiday cooking or to take to a friends’. If you are traveling with it, stick it in the freezer and it will freeze solid, making it travel-proof.
EQUIPMENT
Kitchen Scale
Sauce pan
Pie plate (Whatever size is fine. The smaller the plate, the thicker the pie.)
Mortar & Pestle (Or some other way to crush your hazelnuts)
INGREDIENTS - TART CRUST
100g Almond Flour
50g Cocoa Powder
60g Coconut Oil - Liquid
30g Sugar
Pinch of Salt
INGREDIENTS - FILLING
1 Can / 400g of Full Fat Coconut Milk (Mine was 17% Fat )
250g Dark Chocolate
100g Sugar
1tsp Vanilla
Pinch of Salt
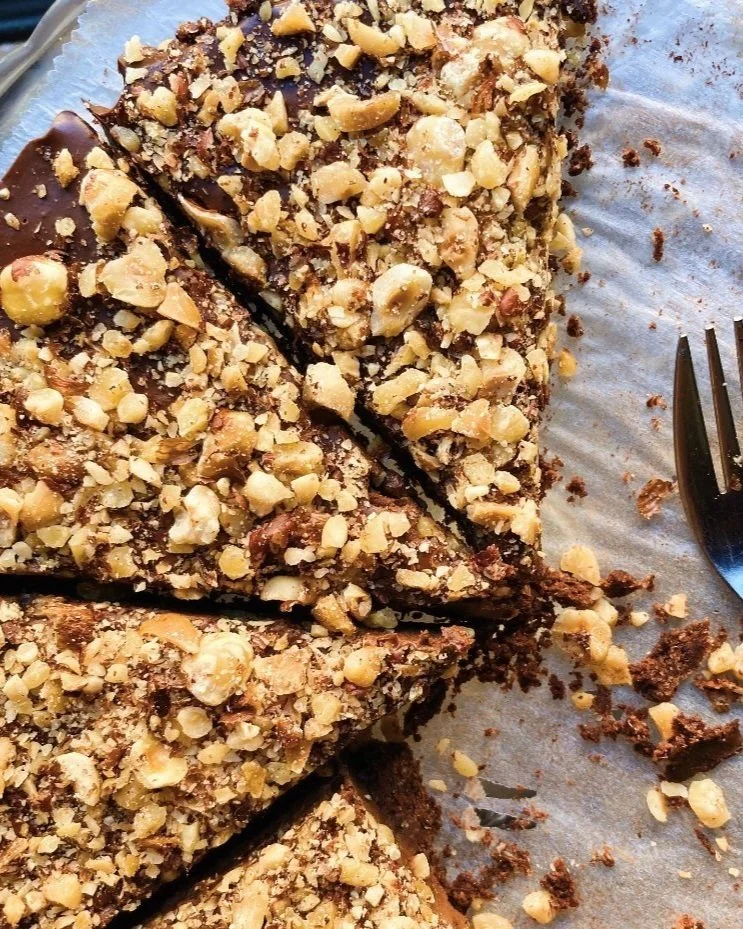
Toasted Hazelnuts
Flaky Sea Salt
TROUBLESHOOTING
I love this pie, but I’m always worried that the filling may not set solid. If that happens then freeze before serving so you can get a clean cut.
If you want to ensure it sets solid, you want to cook the filling long enough / hot enough. When I use a cast iron dutch oven, it takes more like 25 minutes because it takes 5 minutes to heat up whereas if I’m using a light sauce pan, it gets hot very quickly. So make sure it gets to an initial boil before lowering the heat so the filling is bubbling, simmering for at least 20 minutes to ensure it sets solid. You want to see big bubbles erupting on the surface the whole time as opposed to small fast bubbles.


INSTRUCTIONS
Preheat oven to 170*C
Let’s do the nuts first. When nuts enter my house, the entire bag’s contents get toasted before they are used because toasted nuts are empirically better than untoasted nuts. If you have raw hazelnuts, and you’re just toasting them for this tarte, I would say maybe 2 handfuls for abut 10 minutes. Keep an eye and nose out for them as they will start to smell delicious when ready. When cooled, crush them up to sprinkle on top later. Set aside.
Mix all the crust ingredients together. Make sure the coconut oil is in liquid form. Our flat right now is chilly so the coconut oil likes to stay as solid as a bar of soap, so I always have to heat mine up, but it is necessary to ensure the crust sticks to itself and doesn’t crumble.
I line my pie plate with parchment paper and then squish it all in, trying to make an even layer on the bottom. I just use my hands, but a measuring cup or something with a flat bottom helps to flatten it out. If you’re using a smaller pie plate, you may have a lot of crust, so go ahead and squish up to the sides as evenly as possible. It probably won’t go all the way to the top of the pie plate which is normal.
Bake for 15 minutes.
Now for filling! Grab all your ingredients and measure them out.
Add the coconut milk, chocolate chips, sugar and salt into the sauce pan. Get it to an initial boil and then lower the heat to simmer for 20 minutes over medium heat while the pie is baking. Kind of like making caramel or browning butter, don’t go anywhere. Stay put and keep stirring so you don’t get lumps at the bottom. At first it will look like chocolate chips sitting in a coconut milk bath, but it will come together into a thick syrup / shiny pudding. Add the vanilla after you kill the heat.
Take your pie crust out of the oven and kill the heat.
Pour the filling into the pie crust. It will look like a wet chocolate sauce. Sprinkle on crushed hazelnuts and a pinch of flaky salt. ( I always place the pie plate on a sheet pan before it goes in the fridge because it’s very jiggly and wet at this stage, and it is much easier to manoeuvre a cool sheet pan than a piping hot pie plate. I also put down a trivet or something for the sheet pan to rest on in the fridge so the heat isn’t sitting directly on the surface. )
Now this baby needs to go into the fridge to cool, preferably overnight, but for at least 4 hours. Try to be patient because checking it every ten minutes or so like I did will mean it takes that much longer to firm up.
Alright, you did it ! Enjoy !
MAKING MEMORIES